bioadvanced brush killer mixing instructions

BioAdvanced Brush Killer Mixing Instructions: A Comprehensive Guide

Successfully tackling unwanted vegetation hinges on precise mixing; this guide details how to effectively combine BioAdvanced Brush Killer concentrate with water for optimal results.

Understanding BioAdvanced Brush Killer Concentrate

BioAdvanced Brush Killer Plus Concentrate is a potent herbicide designed for controlling a wide spectrum of tough weeds‚ brush‚ vines‚ and woody plants. This isn’t a ready-to-use product; it requires dilution with water before application‚ making accurate mixing crucial for both effectiveness and safety.

The concentrate’s formulation features a special penetrating action‚ allowing it to reach the root system of targeted plants‚ ensuring complete eradication. It’s particularly effective against challenging species like Kudzu‚ Poison Ivy‚ Poison Oak‚ Blackberry‚ and Bramble‚ alongside 70+ other listed weeds. Understanding that it’s a concentrate – and not a pre-mixed solution – is the first step towards successful brush control.

Key Ingredients and Their Roles

While the specific chemical composition is proprietary‚ BioAdvanced Brush Killer Plus Concentrate relies on active ingredients designed to disrupt plant cellular processes. These ingredients work systemically‚ meaning they are absorbed by the plant and transported throughout‚ leading to complete kill – roots and all.

The “special penetrating formula” isn’t just marketing; it likely includes surfactants and other adjuvants that enhance the herbicide’s ability to adhere to plant leaves and penetrate the waxy cuticle. This ensures better absorption and efficacy‚ even on tough‚ established brush. The concentrate’s strength necessitates careful dilution‚ as outlined in the mixing instructions‚ to avoid unintended harm to desirable plants.

Safety Precautions Before Mixing

Prioritize personal protection when handling BioAdvanced Brush Killer Concentrate. Always wear long sleeves‚ long pants‚ chemical-resistant gloves‚ and eye protection (goggles or a face shield) to prevent skin and eye contact. A respirator is recommended‚ especially in enclosed spaces‚ to avoid inhaling fumes.

Mixing should occur in a well-ventilated area‚ away from children‚ pets‚ and food sources. Avoid splashing or spilling the concentrate. If contact occurs‚ immediately rinse affected areas with plenty of water. Read and fully understand the product label’s safety information before beginning. Proper attire and awareness are crucial for safe and responsible herbicide application.

Required Equipment for Mixing

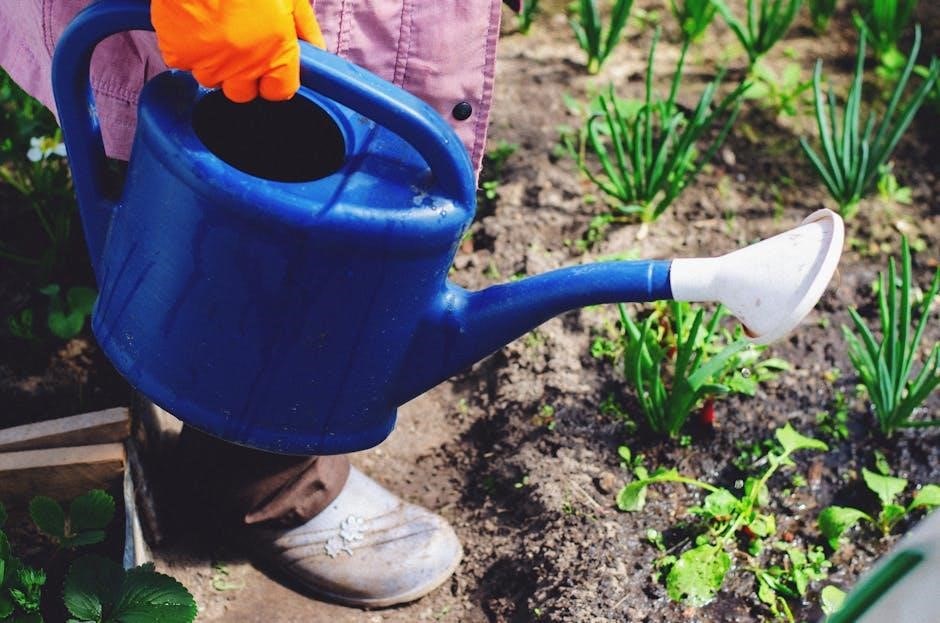
Successful mixing necessitates specific tools for accuracy and safety. You’ll need a calibrated measuring cup or spoons (tablespoons are frequently used) for precise concentrate measurement. A one-gallon container‚ clearly marked for liquid volume‚ is essential for water. A sprayer – handheld‚ backpack‚ or hose-end – is required for application; ensure it’s clean and in good working order.

Chemical-resistant gloves and eye protection are non-negotiable safety items. A long-sleeved shirt and pants are also recommended. A stirring stick or the sprayer’s agitation mechanism will ensure thorough mixing. Having access to clean water for rinsing equipment post-mixing is also vital.

Mixing Ratios for Different Applications

Adjusting the concentrate-to-water ratio is key; options range from 4oz per gallon for general control to 8oz for heavier infestations and spot treatments.

General Brush Control: 4oz per Gallon

For routine brush and weed management‚ a 4oz per gallon mixture provides effective control. This ratio is ideal for tackling actively growing‚ but not severely overgrown‚ vegetation. To prepare‚ carefully measure 4 fluid ounces (or 8 tablespoons) of BioAdvanced Brush Killer concentrate and combine it with one gallon of water within your sprayer.

Ensure thorough mixing to create a homogenous solution – this is crucial for consistent application and optimal results. This dilution is suitable for broad coverage across larger areas experiencing moderate weed pressure. Remember to always consult the product label for specific plant targets and any additional recommendations. Proper mixing ensures the herbicide functions as intended‚ maximizing its impact on unwanted plants while minimizing potential harm to surrounding vegetation.

Heavy Infestation: 8oz per Gallon

When confronting dense‚ well-established brush or a significant weed infestation‚ a stronger concentration is necessary. Increase the mixture to 8 fluid ounces (or 16 tablespoons) of BioAdvanced Brush Killer concentrate per gallon of water. This heightened potency delivers a more aggressive treatment‚ capable of penetrating thicker foliage and reaching deeper root systems.

This ratio is particularly effective against resilient species like Kudzu‚ blackberry‚ or brambles. As with the standard dilution‚ meticulous mixing is paramount for uniform application. Be mindful of potential impacts on non-target plants when using this stronger solution‚ and always adhere to label guidelines regarding application limits and safety precautions. This robust mixture ensures maximum herbicide contact‚ leading to more complete and lasting control.

Spot Treatment Mixing Ratio

For isolated weeds or small patches of brush‚ a spot treatment offers a targeted and efficient solution. While the general recommendation is 4-8 ounces per gallon‚ a slightly adjusted ratio can be beneficial for precision application. Consider mixing 4 fluid ounces (8 tablespoons) of BioAdvanced Brush Killer concentrate with 1 gallon of water for focused control.

This allows for direct application to the unwanted vegetation‚ minimizing overspray and potential harm to surrounding plants. Utilize a smaller sprayer for enhanced accuracy. Remember to thoroughly saturate the leaves of the target weed or brush. Always consult the product label for specific spot treatment instructions and adhere to the maximum application rates to avoid over-treatment and environmental concerns.

Step-by-Step Mixing Instructions

Achieving a potent solution is simple: fill your sprayer with the required water amount‚ carefully add the BioAdvanced concentrate‚ and mix thoroughly for consistent results.

Filling the Sprayer with Water

Begin by ensuring your sprayer is clean and in good working order. Carefully pour the appropriate amount of water into the sprayer‚ referencing your chosen mixing ratio – whether it’s for general brush control requiring one gallon‚ or a smaller quantity for spot treatments.

It’s crucial to leave enough space within the sprayer for the addition of the BioAdvanced Brush Killer concentrate. Most sprayers have fill lines indicating gallon measurements; utilize these for accuracy.

Using clean‚ room-temperature water will aid in the concentrate dissolving properly. Avoid using extremely hot or cold water‚ as this could potentially affect the solution’s efficacy. Always fill the sprayer with water before adding the concentrate to prevent concentrated product buildup.

Adding the BioAdvanced Concentrate

With the sprayer partially filled with water‚ carefully measure the required amount of BioAdvanced Brush Killer concentrate. Remember‚ ratios vary from 4 to 8 fluid ounces per gallon‚ depending on the severity of the infestation and target weeds. Utilize a measuring cup or the integrated markings on the concentrate bottle for precision.

Slowly pour the measured concentrate into the water-filled sprayer. Avoid splashing‚ and ensure the concentrate doesn’t accumulate on the sides of the sprayer.

Adding the concentrate after the water helps ensure proper dilution and minimizes the risk of undissolved product. Double-check your measurements against the product label and your chosen application rate before proceeding to the mixing stage.

Thoroughly Mixing the Solution

After adding the BioAdvanced concentrate‚ secure the sprayer lid tightly. Initiate mixing by vigorously shaking the sprayer for at least one minute. This ensures the concentrate and water are fully combined‚ creating a homogenous solution. Consistent mixing is crucial for uniform application and optimal herbicide effectiveness.

Continue shaking periodically during application‚ especially if the sprayer sits idle for an extended period. This prevents separation and maintains the correct concentration.

A well-mixed solution guarantees even coverage and maximizes the product’s ability to control targeted brush and weeds. Inspect the solution for any undissolved concentrate before spraying.

Application Guidelines

For best results‚ apply when weeds are actively growing‚ ensuring thorough coverage to the foliage for effective absorption and control of unwanted plants.

Optimal Timing for Application

Achieving maximum effectiveness with BioAdvanced Brush Killer relies heavily on timing your application correctly. The ideal period is when target weeds and brush are fully leafed out and exhibiting active growth. This typically corresponds with warmer weather conditions‚ as plant metabolism is heightened‚ facilitating better herbicide uptake.

Avoid application during periods of drought stress‚ as plants will be less receptive to the treatment. Similarly‚ refrain from spraying immediately before or after rainfall‚ as the herbicide may be washed away‚ reducing its impact.

Morning applications are generally preferred‚ allowing the spray to dry before excessive heat builds up‚ minimizing evaporation and maximizing contact time with the foliage. Consistent monitoring of plant growth stages will help pinpoint the most vulnerable time for treatment.

Coverage Area per Gallon of Mixed Solution (500 sq ft)

A single gallon of properly mixed BioAdvanced Brush Killer solution is formulated to effectively treat approximately 500 square feet of targeted vegetation. This coverage rate assumes a standard mixing ratio of 4 fluid ounces of concentrate per gallon of water‚ suitable for general brush control.

However‚ remember that heavier infestations or particularly resilient plant species may necessitate a stronger concentration‚ potentially reducing the coverage area per gallon. Always consult the product label for specific recommendations based on the type of brush or weed you are addressing.

Accurate measurement and consistent application are crucial to ensure optimal results within the designated 500 square foot range.

Application Limits per Year (17 fl oz per 500 sq ft)

To maintain environmental responsibility and prevent potential harm to desirable plants‚ strict adherence to annual application limits is essential. BioAdvanced Brush Killer restricts total product use to a maximum of 17 fluid ounces per 500 square feet of treated area within a 12-month period.

This limitation applies to the total amount of concentrate used‚ encompassing all applications made throughout the year. Careful record-keeping of application dates and quantities is highly recommended to avoid exceeding this threshold.

Exceeding the recommended annual limit may lead to soil or water contamination and could negatively impact non-target vegetation.

Specific Weed Targets & Adjustments

BioAdvanced Brush Killer excels at controlling tough weeds like Kudzu‚ Poison Ivy‚ and Blackberry‚ offering targeted solutions for various brush and vine infestations.

Kudzu‚ Poison Ivy & Poison Oak

These tenacious plants require diligent application for effective control. For Kudzu‚ Poison Ivy‚ and Poison Oak‚ maintaining the recommended mixing ratio of 4-8 fluid ounces per gallon of water is crucial. Ensure thorough coverage of all leaf surfaces‚ as these plants readily spread via runners and vines.

Multiple applications may be necessary‚ especially for established infestations. Pay close attention to the product label’s guidance regarding application limits per year – do not exceed 17 fluid ounces per 500 square feet annually. Consistent monitoring and retreatment of new growth will prevent resurgence. Remember to shake the sprayer frequently during application to maintain a consistent solution.

Blackberry & Bramble Control

Controlling blackberries and brambles demands a robust approach. Utilize the higher end of the recommended mixing ratio – 8 fluid ounces of concentrate per gallon of water – for optimal penetration and systemic action. Focus application on actively growing foliage‚ ensuring complete coverage of canes and leaves.

These plants often form dense thickets‚ so thorough spraying is essential. Be mindful of drift‚ protecting desirable vegetation nearby. Multiple treatments may be needed to eradicate established colonies‚ particularly for root systems. Adhere strictly to the annual application limit of 17 fluid ounces per 500 square feet. Consistent follow-up is key to preventing regrowth.

Other Listed Weeds & Brush

BioAdvanced Brush Killer tackles a wide array of unwanted plants‚ beyond just kudzu or poison ivy. For most listed weeds and brush‚ a standard mixing ratio of 4 fluid ounces per gallon of water generally proves effective. However‚ consider the plant’s maturity and density when deciding.

Ensure complete coverage of the foliage for best results‚ as this product relies on foliar absorption. Repeat applications may be necessary for particularly stubborn species or those emerging from established root systems. Always consult the product label for a comprehensive list of target weeds and specific recommendations. Remember the yearly limit of 17 fl oz per 500 sq ft.

Troubleshooting Mixing Issues

Occasional mixing challenges can arise; addressing concentrate dissolving‚ sprayer clogging‚ or solution separation promptly ensures a successful and efficient application process.

Concentrate Not Dissolving

If you encounter difficulty dissolving the BioAdvanced Brush Killer concentrate‚ several factors could be at play. First‚ ensure you are using water with a suitable temperature – lukewarm water generally promotes better mixing than cold. Secondly‚ vigorous shaking is absolutely crucial; shake the sprayer continuously for at least one minute after adding the concentrate‚ and periodically during application to maintain a homogenous solution.

Insufficient agitation is a common cause. If the issue persists‚ try adding a small amount of surfactant (a few drops of dish soap‚ though not always recommended – check the product label) to help break surface tension and improve solubility. Always double-check the water quality; extremely hard water can sometimes hinder dissolution. Finally‚ confirm you’re using the correct mixing ratio as outlined in the instructions‚ as an overly concentrated mixture can be harder to dissolve.

Sprayer Clogging

A clogged sprayer during BioAdvanced Brush Killer application is frustrating‚ but often preventable. The primary culprit is usually undissolved concentrate or particulate matter. Before starting‚ thoroughly filter the water you’re using to remove any sediment. Ensure the concentrate is completely dissolved with vigorous shaking‚ as previously described‚ and consider a pre-mixing stage in a separate container before adding it to the sprayer.

Regularly check the sprayer nozzle during use. If you notice a slowdown‚ stop immediately and flush the system with clean water. Disassembling and cleaning the nozzle and filter screen after each use is highly recommended. Avoid using extremely fine mesh filters that can easily become blocked. Finally‚ ensure the product hasn’t expired‚ as older formulations can sometimes contain precipitates.

Solution Separating

Observing separation in your BioAdvanced Brush Killer mixture indicates insufficient emulsification. This means the concentrate isn’t staying uniformly dispersed within the water. The key to preventing this is consistent agitation – shake the sprayer vigorously before and during application. Adding a compatible surfactant (check the product label for recommendations) can improve the mixture’s stability‚ helping the concentrate remain suspended.

If separation occurs mid-application‚ stop and shake the sprayer thoroughly to re-combine the solution. Avoid letting the sprayer sit for extended periods without shaking. Using the correct water volume is also crucial; deviating from the recommended ratios can contribute to instability. Regularly inspect the mixture for any signs of separation throughout the spraying process.

php web development with laminas pdf

PHP Web Development with Laminas PDF: An Overview

Laminas Project, utilizing PHP, empowers developers to create robust web applications, and its PDF component offers streamlined document generation capabilities for diverse needs․

Laminas, a robust PHP framework, provides a comprehensive suite of tools for modern web development․ Its PDF component simplifies the complex task of generating PDF documents directly within your web applications․ This integration eliminates the need for external libraries or command-line tools, streamlining workflows․

The framework’s modular architecture allows developers to selectively incorporate the PDF functionality, keeping applications lean and efficient․ Laminas facilitates dynamic content population, enabling the creation of personalized reports, invoices, and catalogs․ It’s a powerful solution for any PHP project requiring server-side PDF creation․

Why Choose Laminas for PDF Creation?

Laminas offers a compelling advantage for PHP developers needing PDF generation․ Its tight integration with the framework promotes code consistency and maintainability, unlike standalone libraries․ The component supports advanced features like font embedding, image inclusion, and table creation, ensuring professional-quality documents․

Furthermore, Laminas’ MVC architecture facilitates seamless integration into existing projects․ Dynamic content population from databases is straightforward, enabling personalized PDFs․ The robust documentation and active community provide ample support, making Laminas a reliable choice for complex PDF requirements․

Setting Up Your Development Environment

Laminas PHP development requires a project installation and specific PHP extensions to ensure proper PDF functionality and a smooth workflow․

Installing Laminas Project

Laminas project installation typically begins with Composer, PHP’s dependency manager․ Utilize the command composer create-project laminas/laminas-mvc-skeleton to scaffold a new application․ This command downloads the Laminas MVC skeleton, providing a foundational structure for your PDF-focused web development․

Ensure PHP and Composer are correctly configured on your system before proceeding․ Following installation, navigate into the project directory and initiate the development server using php -S localhost:8080 -t public․ This allows you to access the application in your web browser and begin integrating PDF generation features․

Required PHP Extensions for PDF Support

Successful PHP PDF generation with Laminas relies on several key extensions; GD is crucial for image manipulation, often needed when embedding images within PDF documents․ MBString provides essential multi-byte string support, vital for handling diverse character encodings correctly․

Furthermore, ensure the PDF extension itself is enabled within your PHP configuration (php․ini)․ Verify these extensions are installed and activated via php -m in your terminal․ Proper configuration guarantees seamless PDF creation and avoids common rendering issues․

Core Concepts of PDF Generation with Laminas

Laminas PDF utilizes objects representing pages, fonts, and content streams, enabling developers to construct documents programmatically with precise control․

Understanding Laminas PDF Component

Laminas PDF is a powerful, flexible library within the Laminas Project designed for generating PDF documents from PHP applications․ It provides a comprehensive set of tools for creating complex layouts, managing fonts, incorporating images, and handling various PDF features․

Unlike directly manipulating PDF syntax, Laminas PDF offers an object-oriented approach, simplifying the development process․ Developers interact with classes representing PDF elements – pages, fonts, colors, and content – to build documents programmatically․ This abstraction enhances code readability and maintainability, fostering efficient PHP web development․

Basic PDF Document Structure

A Laminas PDF document fundamentally comprises pages, each containing content arranged within a rectangular area․ Developers begin by creating a PDF object and adding pages to it․ Each page requires defining its size and orientation․ Content is added using various methods, including text, shapes, and images․

Fonts are crucial; Laminas PDF supports embedding fonts for consistent rendering across different systems․ Styles, like font size and color, are applied to text elements․ Understanding this hierarchical structure – document, page, content – is key to effective PHP-based PDF generation․

Generating Simple PDFs

Laminas PDF simplifies creating basic documents in PHP; developers instantiate the component, define page layouts, and output the generated PDF content easily․

Creating a Basic PDF File

Laminas PDF streamlines the process of generating PDF documents within PHP web applications․ Initially, you’ll instantiate a PDF object, representing the document itself; Subsequently, you define a PDF page, specifying dimensions and layout․

Essential steps involve setting the page size and orientation․ You can then add content, such as text or images, to this page․ Finally, outputting the PDF involves setting appropriate headers and echoing the PDF data to the browser, enabling download or viewing․

Adding Text Content to a PDF

Laminas PDF facilitates adding text to documents using various methods․ You define a font – selecting style and size – and then specify the text string and its position on the page․ Precise control over text alignment (left, center, right) and line spacing is achievable․

For complex layouts, consider using text blocks or flowing text․ PHP code manages these elements, ensuring proper rendering within the PDF․ Remember to handle character encoding correctly to avoid display issues, especially with non-English characters․

Advanced PDF Features

Laminas PDF extends beyond basics, enabling sophisticated features like custom fonts, embedded images, and complex table structures within dynamically generated PHP documents․

Working with Fonts and Styles

Laminas PDF provides extensive control over typography․ Developers can embed various font types – TrueType, OpenType, and more – directly into the PDF, ensuring consistent rendering across different systems․

Styling options are equally comprehensive, allowing precise adjustments to font size, color, weight (boldness), and style (italics)․ You can define custom styles and apply them consistently throughout the document․

Furthermore, Laminas supports advanced text formatting, including alignment, indentation, and line spacing, enabling the creation of visually appealing and professional-looking PDF reports and documents using PHP․

Adding Images to PDFs

Laminas PDF simplifies image integration into your documents․ The component supports a wide range of image formats, including JPEG, PNG, and GIF, allowing for flexible content inclusion within PHP-generated PDFs․

Developers can precisely control image placement, size, and scaling․ Options exist to adjust image quality and compression levels, optimizing file size without significant visual degradation․

Furthermore, Laminas enables adding images with transparency and applying various effects, enhancing the visual appeal of reports, invoices, or catalogs created using the Laminas framework․

Creating Tables in PDFs

Laminas PDF provides powerful tools for constructing complex tables within PHP-generated documents․ Developers can define table structures with specified column widths, borders, and cell alignment options, ensuring clear data presentation;

The component supports merging cells, adding headers and footers, and applying background colors to enhance table readability․ Dynamic content population is easily achieved through looping constructs in PHP․

Laminas simplifies the creation of professional-looking tables for invoices, reports, and catalogs, offering granular control over table styling and data formatting within PDF outputs․

Dynamic PDF Generation

Laminas PDF, integrated with PHP, facilitates creating PDF documents populated with data retrieved from databases, enabling personalized and up-to-date reports․

Fetching Data from Databases

Laminas PDF generation often requires dynamic content, sourced from databases․ Utilizing PHP’s database connectivity features – like PDO – developers can query databases (MySQL, PostgreSQL, etc․) to retrieve relevant information․ This data is then formatted and integrated into the PDF document․

Efficient database queries are crucial for performance․ Consider using prepared statements to prevent SQL injection vulnerabilities and optimize data retrieval․ The fetched data can be structured into arrays or objects, making it easier to manipulate and insert into the PDF layout using Laminas’ functionalities․

Populating PDFs with Dynamic Content

Once data is fetched, Laminas PDF allows seamless integration into document elements․ PHP variables containing database results can be used to populate text fields, tables, and even images within the PDF․ Iterative loops are often employed to dynamically add rows to tables or create lists based on the retrieved data․

Laminas provides methods for formatting data – dates, numbers, currencies – before insertion․ Careful consideration of data types and appropriate formatting ensures a professional and accurate PDF output․ This dynamic approach enables the creation of personalized reports, invoices, and catalogs․

Laminas PDF and MVC Architecture

Laminas integrates PDF generation within the MVC structure; controllers orchestrate data flow to PDF “views”, ensuring separation of concerns and maintainability․

Integrating PDF Generation into Controllers

Controllers serve as the central point for initiating PDF creation within a Laminas application․ They receive requests, interact with models to retrieve data, and then instantiate the Laminas PDF component;

The controller then passes the necessary data to the PDF component, often utilizing a dedicated view script to format the document․ This approach promotes code reusability and separation of concerns․ Controllers manage the overall process, ensuring data integrity and proper PDF rendering before sending the generated file as a response․

Passing Data from Models to PDF Views

Models encapsulate application data, and efficiently transferring this data to PDF views is crucial․ Controllers fetch data from models and then prepare it as an array or object, suitable for the view․ This data includes details like invoice items, report summaries, or catalog entries․

The view script then accesses this data to dynamically populate the PDF document․ Utilizing Laminas’ view helpers simplifies data formatting and presentation within the PDF, ensuring a clean and organized output․

Practical Examples and Use Cases

Laminas PDF excels at generating dynamic documents like invoices, detailed reports, and comprehensive catalogs, streamlining business processes and data presentation effectively․

Generating Invoices

Laminas PDF simplifies invoice creation within PHP web applications․ Developers can dynamically populate PDF invoices with data sourced from databases, including client details, itemized lists, quantities, prices, and calculated totals․

Utilizing Laminas’ features, you can precisely control layout, fonts, and styling to match branding requirements․ Automated invoice generation reduces manual effort, minimizes errors, and ensures consistent professional documentation․

Furthermore, features like adding company logos, addresses, and unique invoice numbers are easily implemented, enhancing the invoice’s credibility and professionalism․

Creating Reports

Laminas PDF excels at generating comprehensive reports within PHP applications․ Developers can extract data from databases and present it in structured PDF formats, including tables, charts, and detailed summaries; This is crucial for business intelligence and data analysis․

Laminas allows customization of report layouts, incorporating headers, footers, page numbers, and branding elements․ Automated report generation saves time and ensures data accuracy․

Complex reports with multiple sections and varying data types are easily managed, providing valuable insights for informed decision-making․

Building PDF Catalogs

Laminas PDF simplifies the creation of professional-looking PDF catalogs using PHP․ Developers can dynamically populate catalogs with product information, images, and descriptions sourced from databases or other data sources․

Features like bookmarks and clickable links enhance catalog navigation, improving the user experience․ Precise control over layout and design ensures brand consistency․

Automated catalog generation streamlines updates and reduces manual effort, making it ideal for businesses with frequently changing product offerings and large inventories․

Troubleshooting Common Issues

Laminas PDF challenges often involve font embedding and character encoding; careful configuration and testing are crucial for consistent, accurate PDF document rendering․

Handling Font Embedding Problems

Font embedding within Laminas PDF can present difficulties, often stemming from licensing restrictions or unsupported font formats․ Ensure the chosen fonts permit embedding for commercial use․ Verify that the necessary font files (TTF or OTF) are accessible to the PHP process․

If issues persist, attempt to use standard, widely supported fonts like Arial or Times New Roman as a baseline․ Consider explicitly specifying the font subset to reduce file size and potential embedding conflicts․ Debugging tools can help identify if the font is correctly loaded and embedded within the generated PDF document․

Addressing Character Encoding Issues

Character encoding problems in Laminas PDF often arise when dealing with non-ASCII characters․ Always explicitly set the document’s encoding to UTF-8 during PDF creation․ Ensure your PHP scripts themselves are also saved in UTF-8 format․ When fetching data from databases, verify the connection encoding is also set to UTF-8․

If characters still appear incorrectly, investigate the font’s encoding support․ Some fonts may lack glyphs for specific characters․ Consider using a font that comprehensively supports the required character set, or utilize Unicode-based fonts for broader compatibility․

Resources and Further Learning

Laminas’ official documentation and active community forums provide extensive support for PHP developers utilizing the PDF component for web applications․

Official Laminas Documentation

Laminas provides comprehensive, well-maintained documentation as the primary resource for developers․ This documentation covers all aspects of the framework, including the PDF component, offering detailed explanations, code examples, and API references․

You’ll find guides on installation, configuration, core concepts, and advanced features related to PDF generation with PHP․ The documentation is regularly updated to reflect the latest changes and best practices within the Laminas ecosystem;

Accessing this resource directly ensures you’re working with the most accurate and up-to-date information for successful PDF implementation in your web projects․

Community Forums and Support

The Laminas community offers valuable support through various channels, including dedicated forums and online discussion groups․ These platforms allow developers to connect, share knowledge, and seek assistance with PHP and PDF-related challenges․

Experienced Laminas users and contributors actively participate, providing solutions, code snippets, and guidance on best practices for PDF generation․

Leveraging these community resources can significantly accelerate your development process and help overcome obstacles encountered while building web applications with Laminas․

legionella risk assessment form for landlords pdf

Legionella Risk Assessment for Landlords: A Comprehensive Guide

Legionella risk assessment templates, guidance notes, and review templates are crucial for landlords, ensuring compliance with regulations like the 2022 Short-term Lets Order.

These PDF forms aid in evaluating water systems, documenting temperature checks, and identifying potential risks, while also emphasizing tenant education regarding Legionella.

Utilizing a structured template helps landlords record system components, materials, and risk levels, facilitating a thorough and legally sound assessment of their properties.

Understanding Legionella and Legionnaires’ Disease

Legionella bacteria, the source of concern for landlords utilizing a risk assessment form, are naturally found in freshwater environments. However, they become hazardous when they enter human systems through water droplets – such as from showers, taps, or air conditioning units. This can lead to Legionnaires’ disease, a severe form of pneumonia.

The disease presents with flu-like symptoms, including cough, fever, muscle aches, and headache, potentially escalating to a life-threatening respiratory illness. Understanding this pathway is vital when completing a landlord’s Legionella risk assessment (PDF), as it highlights the importance of controlling water temperature and preventing stagnation.

The Civic Government (Scotland) Act 1982 underscores the seriousness of this risk, particularly within rented properties. A comprehensive assessment, documented using a suitable form, isn’t merely a legal requirement but a crucial step in protecting tenant health and well-being. Proper identification of potential breeding grounds is key.

The Legal Duty of Landlords

Landlords have a clear legal duty to ensure the safety of their tenants, and this extends to managing the risk of exposure to Legionella bacteria. The Civic Government (Scotland) Act 1982, specifically the 2022 Short-term Lets Order, places responsibilities on property owners, regardless of water supply source – Scottish Water or private systems.

Completing a Legionella risk assessment (PDF) isn’t optional; it’s a legal requirement demonstrating due diligence. Landlords must be ‘competent’ to assess the water systems, meaning they possess the knowledge to identify potential hazards and implement control measures. If competence is lacking, a specialist assessment is necessary.

Failure to comply can result in penalties and, more importantly, puts tenants at risk. A documented assessment, utilizing a standardized form, provides evidence of compliance and a proactive approach to tenant safety. This demonstrates responsible property management and adherence to legal obligations.

Scope of the Risk Assessment

The scope of a Legionella risk assessment, documented via a comprehensive PDF form, must cover all potential water outlets within a rental property. This includes hot and cold water systems, showers, taps, and any appliances connected to the water supply, like washing machines or dishwashers.

The assessment should extend to cold water storage tanks, identifying potential for stagnation and biofilm growth. Boiler and heating systems also fall within the scope, requiring examination for appropriate temperature control. Particular attention should be paid to infrequently used outlets – ‘dead legs’ – where bacteria can proliferate.

A thorough risk assessment form guides landlords through a systematic review of these components, prompting detailed recording of temperatures, materials, and potential hazards. The goal is to identify and evaluate all areas where Legionella could grow and spread.

Identifying Potential Risks in Rental Properties

Landlords utilize PDF risk assessment forms to pinpoint hazards within water systems, including stagnation, low temperatures, and biofilm formation, ensuring tenant safety.

These forms guide inspection of tanks, showers, and outlets, revealing potential Legionella growth areas needing mitigation and careful documentation.

Water System Types and Their Risks

Landlords employing a Legionella risk assessment form (PDF) must differentiate between various water systems to accurately gauge potential hazards. Simple systems, like those in individual flats with direct water feeds, generally pose lower risks if maintained correctly.

However, complex systems – found in larger properties or those with shared pipework – demand heightened scrutiny. These include cold water storage tanks, which can harbor bacteria, and hot water systems susceptible to temperature fluctuations.

The PDF form prompts assessment of shower systems, particularly those with spray nozzles, and infrequently used outlets, known as ‘dead legs’, where stagnation promotes growth. Understanding the system type dictates the thoroughness of inspection and the control measures required, as detailed within the completed assessment.

Furthermore, the form aids in identifying potential risks associated with spa pools or hot tubs, if present, requiring specific attention due to their warm, aerosol-generating nature.

Potential Sources of Legionella Growth

A comprehensive Legionella risk assessment form (PDF) guides landlords to pinpoint areas conducive to bacterial proliferation. Stagnant water is a primary concern; infrequently used taps, showerheads, and pipework ‘dead legs’ provide ideal breeding grounds.

Biofilm – a slimy layer inside pipes – harbors Legionella, and the PDF prompts inspection for its presence. Scale and rust within pipework also contribute to growth, necessitating examination of water tanks and heating systems.

Low water temperatures (below 20°C) and inconsistent hot water delivery (below 60°C) are critical risk factors highlighted on the form. Aerosol-producing devices, like showerheads and spa jets, disseminate contaminated water, increasing exposure;

The form also encourages noting connections to outdoor water sources or features, as these can introduce contaminants. Thorough documentation of these potential sources is vital for effective control measures.

High-Risk Areas Requiring Focused Assessment

The Legionella risk assessment form (PDF) emphasizes prioritizing specific areas within rental properties. Showers and taps are flagged as high-risk due to aerosol production, demanding detailed inspection of showerheads for biofilm and scale.

Hot and cold water storage tanks require meticulous examination, focusing on sediment build-up, temperature consistency, and the integrity of lids to prevent contamination. Complex plumbing systems, particularly those with ‘dead legs’, necessitate careful scrutiny.

Properties with spa pools or hot tubs are considered high-risk, requiring assessment of disinfection procedures and water quality. Infrequently occupied properties, like holiday lets, demand heightened attention due to potential water stagnation.

The PDF guides landlords to identify and document these areas, assigning appropriate risk levels and outlining targeted control measures to mitigate potential Legionella exposure.

Conducting the Risk Assessment: A Step-by-Step Approach

Utilizing a Legionella risk assessment form (PDF) guides landlords through surveys, temperature checks, and system inspections for a comprehensive evaluation.

This structured process ensures thorough identification of potential hazards and appropriate control measure implementation within rental properties.

Initial Property Survey and System Overview

Landlords initiating a Legionella risk assessment, utilizing a detailed PDF form, must begin with a comprehensive property survey.

This initial step involves meticulously mapping all water systems – hot and cold – within the rental property, noting pipework materials (copper, plastic, etc.) and identifying the location of all outlets.

The assessment form prompts documentation of water tanks (including cold water storage), boilers, and any potential dead legs or infrequently used taps.

Crucially, the survey should also identify appliances connected to the water system, such as washing machines or dishwashers, and any features like showers or spa pools.

A clear system overview, recorded on the PDF, establishes a baseline for subsequent temperature checks and risk identification, ensuring a focused and effective assessment.

Temperature Checks: Hot and Cold Water Systems

The Legionella risk assessment PDF form places significant emphasis on accurate temperature monitoring of both hot and cold water systems.

Landlords must record temperatures at the outlet closest to the hot water source and at the furthest point, ensuring representative readings are obtained.

The form guides recording of hot water temperatures, ideally above 50°C (122°F) at the source and above 55°C (131°F) at the furthest outlet, to mitigate Legionella growth.

Cold water temperatures should be consistently below 20°C (68°F) to prevent bacterial proliferation.

Consistent documentation of these readings, using the form’s designated sections, is vital for demonstrating due diligence and identifying potential temperature control issues requiring remediation.

Inspection of Water Tanks (Cold Water Storage)

The Legionella risk assessment form (PDF) dedicates a specific section to the thorough inspection of cold water storage tanks, a potential breeding ground for bacteria.

Landlords are prompted to assess the tank’s condition, noting any signs of corrosion, sediment build-up, or discoloration, which can harbor Legionella.

The form guides documentation of the tank’s lid – ensuring it’s secure and prevents ingress of contaminants – and the presence of appropriate warning labels.

It also requires recording details about the tank’s insulation, preventing condensation and temperature fluctuations.

Detailed notes on water quality, including any unusual odors or tastes, are crucial, alongside observations about the condition of inlet and outlet pipes, ensuring a comprehensive record for risk mitigation.

Boiler and Heating System Examination

The Legionella risk assessment form (PDF) includes a dedicated section for examining the boiler and overall heating system, vital for identifying potential risks.

Landlords must document the boiler’s age, service history, and any visible signs of corrosion or damage, impacting water heating efficiency and safety.

The form prompts recording of the boiler’s operating temperature, ensuring it reaches a sufficient level to kill Legionella bacteria – typically above 60°C.

It also requires assessment of the heating system’s circulation, identifying ‘dead legs’ – unused pipework where stagnant water can promote bacterial growth.

Detailed notes on the system’s pressure relief valve and any associated pipework are essential, alongside observations about the overall cleanliness and maintenance of the system.

Shower and Tap Outlet Inspections

The Legionella risk assessment form (PDF) emphasizes thorough inspection of all shower and tap outlets within the rental property, crucial for identifying potential hazards.

Landlords should document the condition of showerheads, noting any build-up of limescale or biofilm, which can harbor Legionella bacteria and reduce water flow.

The form prompts recording of water temperature at the outlet, verifying it consistently reaches a safe level – above 50°C – to minimize bacterial growth.

Assessments should include checking for loose fittings or damaged taps, which can create stagnant water pockets and increase the risk of contamination.

Particular attention must be paid to infrequently used outlets, as these are more prone to stagnation; the form guides documenting flushing procedures for these areas.

Documenting the Assessment: The Legionella Risk Assessment Form

Landlords utilize PDF risk assessment forms to meticulously record findings, including water temperatures, system components, and identified hazards, ensuring legal compliance.

These forms guide the rating of risk levels, facilitating a structured approach to Legionella control and comprehensive property documentation.

Key Sections of a Landlord’s Legionella Risk Assessment Form (PDF)

A comprehensive Legionella risk assessment form, typically in PDF format, is structured to guide landlords through a systematic evaluation of their property’s water systems. Key sections begin with property details – address, type, and occupancy information. Crucially, it includes a detailed system overview, mapping all water outlets and storage components.

The form then focuses on temperature recording sections for both hot and cold water, requiring specific readings at various points. Inspection checklists cover boilers, cold water storage tanks, and shower/tap outlets, prompting assessment of condition and potential stagnation. A dedicated area identifies ‘dead legs’ – unused pipework – and connected appliances.

Risk level identification is a core component, utilizing a scoring system to categorize potential hazards. Finally, the form includes space to document control measures implemented, review dates, and assessor competency, ensuring a complete and auditable record. These forms are vital for demonstrating due diligence.

Recording Water Temperature Readings

The Legionella risk assessment form (PDF) dedicates significant space to meticulously recording water temperatures, a critical step in identifying potential risks. Specifically, the form prompts landlords to document temperatures at the point of outlet – taps, showers, and sinks – for both hot and cold water systems.

Hot water temperatures should be recorded as close to the tap as possible, verifying they consistently reach above 50°C (122°F) to effectively kill Legionella bacteria. Cold water temperatures are also noted, aiming for below 20°C (68°F) to minimize bacterial growth.

The form typically includes columns for date, time, location, and temperature readings, allowing for trend analysis. Regular recording – and documentation – demonstrates proactive monitoring and helps identify any temperature fluctuations requiring immediate attention and corrective action. Accurate records are essential for compliance.

Documenting System Components and Materials

A comprehensive Legionella risk assessment form (PDF) requires detailed documentation of all water system components and materials within the rental property. This includes identifying the type of water system – direct or indirect – and listing all connected appliances like washing machines, dishwashers, and showers.

The form prompts landlords to specify the materials used in the piping (e.g., copper, plastic) and the construction of cold water storage tanks. Noting the presence of “dead legs” – unused pipework – is crucial, as these can harbor stagnant water and promote bacterial growth.

Detailed records of boiler type, age, and maintenance history are also essential. Accurate documentation allows for a thorough understanding of the system’s vulnerabilities and informs appropriate control measures, ensuring a safe water environment for tenants.

Identifying and Rating Risk Levels

The Legionella risk assessment form (PDF) guides landlords in systematically identifying potential hazards within the water system. This involves evaluating factors like water temperature, stagnation risks, and the susceptibility of occupants. The form typically includes a section for rating the likelihood and severity of Legionella growth.

A common approach utilizes a numerical scale – for example, 1 to 10 – where lower numbers indicate lower risk and higher numbers signify a significant hazard. Considerations include the age and health of tenants, as well as the frequency of water outlet use.

Accurate risk level assessment is vital for prioritizing control measures. Higher-risk areas demand immediate attention, while lower-risk areas may require less frequent monitoring, ensuring a proportionate and effective safety strategy.

Control Measures and Mitigation Strategies

Landlords utilize the risk assessment form (PDF) to document control measures like flushing infrequently used outlets, maintaining proper temperatures, and, if needed, water disinfection.

These strategies, guided by the form’s findings, minimize Legionella growth and protect tenant health, ensuring regulatory compliance and responsible property management.

Flushing Procedures for Infrequently Used Outlets

The Legionella risk assessment form (PDF) emphasizes regular flushing of outlets unused for extended periods, a critical control measure. Stagnant water fosters bacterial growth, increasing Legionella risks.

Landlords should meticulously record flushing frequency and duration on the form. Guidelines typically recommend flushing all outlets for several minutes, ensuring complete water turnover. This procedure dislodges biofilm where bacteria colonize.

The form prompts documentation of outlets identified as infrequently used – such as guest bathroom taps or showerheads in vacant properties. A schedule for flushing these points should be established and consistently followed.

Proper flushing, documented via the risk assessment form, demonstrates due diligence and minimizes potential hazards, protecting tenants and fulfilling legal obligations. Consistent record-keeping is paramount.

Temperature Control and Maintenance

The Legionella risk assessment form (PDF) places significant emphasis on maintaining appropriate water temperatures. Hot water systems must consistently reach 60°C (140°F) at the outlet to kill Legionella bacteria.

Landlords must record regular temperature checks on the form, documenting readings from various points within the system. Cold water should remain below 20°C (68°F) to inhibit bacterial growth. Deviations require immediate attention.

The form prompts documentation of boiler settings, thermostat functionality, and any temperature control failures. Regular maintenance, including boiler servicing, is crucial and should be recorded.

Consistent temperature monitoring and prompt maintenance, as evidenced by the completed risk assessment form, demonstrate a proactive approach to Legionella control, safeguarding tenants and ensuring compliance.

Water Softening and Disinfection (If Applicable)

The Legionella risk assessment form (PDF) includes a section to detail any water softening or disinfection systems present. While not always necessary, these systems can impact Legionella control.

If a water softener is installed, the form requires documentation of its type, maintenance schedule, and salt levels. Improperly maintained softeners can create conditions favorable for bacterial growth.

For disinfection systems – such as chlorine dosing – the form necessitates recording dosage levels, monitoring frequency, and compliance with water quality standards. Accurate records are vital.

The completed form should clearly state whether such systems are in use, and if so, demonstrate a robust monitoring and maintenance regime. This section confirms a comprehensive approach to water safety, beyond basic temperature control.

Review and Monitoring

The Legionella risk assessment form (PDF) emphasizes regular review and meticulous record-keeping, alongside tenant communication, to ensure ongoing water safety compliance.

Consistent documentation of assessments, temperatures, and control measures is vital, demonstrating proactive management and adherence to legal requirements for landlords.

Regular Review of the Risk Assessment

Landlords utilizing a Legionella risk assessment form (PDF) must understand that the initial assessment isn’t a one-time task. The document itself highlights the necessity for periodic reviews, ensuring the continued accuracy and effectiveness of control measures.

These reviews should occur regularly – at least annually, or more frequently if there are changes to the water system, property usage, or identified risks. Changes could include new plumbing installations, alterations to hot/cold water temperatures, or periods of prolonged inactivity (like during winter months or between tenants).

The PDF form facilitates this process by providing a structured record of previous findings, allowing landlords to easily compare current conditions against historical data. Documenting the review date, reviewer’s name, and any modifications made to the assessment is crucial for demonstrating due diligence and compliance with regulations. A consistent review process, guided by the form, protects both tenants and landlords.

Record Keeping and Documentation Requirements

Proper record keeping is paramount when utilizing a Legionella risk assessment form (PDF). The completed form itself serves as a key document, demonstrating a landlord’s compliance with their legal duties. It’s not enough to simply conduct the assessment; you must retain evidence of it.

This includes keeping the original completed PDF, along with any supporting documentation such as temperature readings, inspection reports, and records of any remedial actions taken. These records should be readily accessible and stored securely for a minimum of five years, potentially longer depending on local regulations.

Detailed documentation, facilitated by the form’s structured layout, proves due diligence in the event of an investigation or claim. Maintaining a clear audit trail – showing when assessments were conducted, by whom, and what actions were taken – is essential for protecting both tenants and the landlord.

Tenant Education and Communication

While the Legionella risk assessment form (PDF) primarily focuses on landlord responsibilities, tenant awareness is a crucial supplementary element. Communicating key findings and preventative measures to tenants fosters a safer environment and demonstrates responsible property management.

Inform tenants about the potential risks of Legionella and encourage them to report any concerns regarding water quality or unusual symptoms, such as flu-like illness. Explain any actions they can take to minimize risk, like flushing infrequently used taps.

Although tenants aren’t responsible for conducting the assessment, understanding the process and the landlord’s commitment to water safety builds trust. Providing a summary of the assessment findings, in plain language, can be beneficial. Clear communication, alongside diligent record-keeping, is vital.

Competency and When to Seek Professional Help

Landlords can perform simple assessments using a Legionella risk assessment form (PDF) for single dwellings, but specialist help is vital for complex systems.

Competency is key; if unsure, a professional ensures thorough evaluation and compliance with regulations, safeguarding both tenants and the property.

Landlord Competency for Simple Assessments

For single-dwelling properties with straightforward water systems, landlords can often competently conduct a Legionella risk assessment themselves, utilizing a readily available Legionella risk assessment form (PDF) as a guide.

This self-assessment hinges on a solid understanding of basic water system types and potential Legionella breeding grounds. The landlord must be capable of accurately recording water temperatures, identifying potential risks like dead legs, and documenting system components.

Successfully completing the PDF form requires familiarity with the control measures outlined within it – flushing procedures, temperature maintenance, and recognizing when a system deviates from normal operation. However, this competency is limited to simpler setups; more complex systems necessitate professional expertise.

Essentially, the landlord’s ability to interpret the form and implement appropriate controls is paramount for a valid self-assessment.

When a Specialist Legionella Risk Assessment is Necessary

A specialist Legionella risk assessment becomes crucial when a property’s water system exceeds the scope of a landlord’s competency, even with a detailed Legionella risk assessment form (PDF) in hand.

Complex systems – those with multiple outlets, hot and cold water mixing loops, or serving multiple occupants – demand expert evaluation. Properties with spa pools, hot tubs, or complex heating systems also require specialist attention.

Furthermore, if the initial self-assessment, documented on the PDF form, reveals significant risks or uncertainties, a professional is essential. This includes identifying unusual water conditions or a history of water system issues.

Ultimately, prioritizing safety and legal compliance necessitates engaging a qualified professional to conduct a thorough assessment and implement appropriate control measures when the landlord lacks the necessary expertise.

pre knee replacement exercises pdf

Prehabilitation (prehab) proactively prepares your body for surgery, adapting rehabilitation techniques to prevent issues and improve future results. It’s about empowering
you to take control of your health before the procedure, focusing on strengthening and mobility.

What is Prehabilitation (Prehab)?

Prehabilitation, or prehab, represents a proactive and preventative approach to healthcare, increasingly recognized for its benefits before major surgeries like total knee replacement. Unlike traditional rehabilitation which begins after a procedure, prehab focuses on optimizing a patient’s physical condition before surgery.

It borrows techniques from rehabilitation and sports medicine, teaching individuals to independently manage their well-being and proactively address potential pain or injury. The core idea is to build strength, flexibility, and endurance, essentially “preparing” the body for the demands of surgery and the subsequent recovery process; Prehab isn’t just about physical preparation; it’s about empowering patients to actively participate in their own care.

The Importance of Strengthening Before Surgery

Strengthening exercises before a knee replacement are crucial for optimizing surgical outcomes and accelerating recovery. Building muscle strength, particularly in the quadriceps, hamstrings, and glutes, provides a foundation of support for the knee joint. This improved muscle mass can lead to better post-operative function and reduced pain.

Pre-surgical strengthening may also help patients cope with the physical demands of rehabilitation, allowing them to progress more quickly through therapy. While research suggests outcomes aren’t significantly improved, proactive preparation empowers patients and potentially minimizes complications. A stronger body entering surgery is simply better equipped to handle the stress and heal effectively.

Key Muscle Groups to Target

Focus on strengthening the quadriceps, hamstrings, gluteal muscles, and calf muscles; these groups directly support the knee and contribute to stability.

Quadriceps Strengthening

Strong quadriceps are crucial for stabilizing the knee joint and improving function before a total knee replacement. Exercises should focus on building endurance and strength in these muscles. Begin with straight leg raises, contracting the quad to lift the leg while keeping it straight.

Wall slides are another excellent option, gently sliding down a wall while maintaining a slight bend in the knees. Gradually increase the depth of the slide as strength improves; Chair squats, performed with controlled movements, also effectively target the quads. Remember to use a sturdy chair and focus on proper form.

Consistency is key; aim for regular sessions to maximize benefits and prepare your body for a successful recovery post-surgery.

Hamstring Strengthening

Strengthening the hamstrings is vital for balanced knee function and stability prior to knee replacement surgery. Weak hamstrings can contribute to post-operative difficulties. Heel slides are a gentle yet effective exercise, involving sliding the heel towards the buttocks while keeping the leg straight, engaging the hamstring muscles.

Standing hamstring curls, using resistance bands or light weights, provide a more challenging workout. Focus on controlled movements and avoid jerking. Bridging exercises, where you lift your hips off the floor while squeezing your glutes and hamstrings, also contribute to hamstring strength.

Remember to perform these exercises with proper form to prevent injury and maximize their effectiveness in preparing your knee for surgery.

Gluteal Muscle Strengthening

Strengthening the gluteal muscles – your buttocks – is crucial for hip and knee stability, directly impacting how well you recover after knee replacement. Weak glutes can lead to altered gait and increased stress on the knee joint. Glute bridges are an excellent starting point; lie on your back with knees bent and lift your hips, squeezing your glutes at the top.

Side-lying leg lifts target the gluteus medius, essential for hip stabilization. Clamshells, performed lying on your side with knees bent, further strengthen these muscles. Incorporate resistance bands for increased challenge as you progress.

Focus on controlled movements and proper form to effectively engage the gluteal muscles and prepare them for the demands of post-operative rehabilitation.

Calf Muscle Strengthening

Strong calf muscles are vital for walking, balance, and supporting the knee joint during movement. Pre-strengthening them prepares you for post-operative rehabilitation and improves functional outcomes. Standing calf raises are a foundational exercise; simply rise up onto your toes, focusing on a controlled ascent and descent.

To increase difficulty, perform seated calf raises, which target the soleus muscle more specifically. You can also add resistance using dumbbells or a resistance band. Ensure a full range of motion, feeling the stretch in your calves at the bottom of each repetition.

Prioritize proper form and gradual progression to avoid strain and maximize effectiveness.

Specific Exercises for Pre-Knee Replacement

Targeted exercises like straight leg raises, wall slides, heel slides, chair squats, and calf raises build strength and flexibility, preparing your knee for optimal recovery.

Straight Leg Raises

Straight leg raises are a foundational exercise for pre-knee replacement preparation, effectively strengthening the quadriceps muscles. To perform this exercise, lie flat on your back with one leg bent and the other extended straight. Slowly lift the extended leg approximately 6-12 inches off the ground, keeping the knee locked. Hold this position for 5-10 seconds, focusing on engaging the thigh muscles.

Gradually lower the leg back to the starting position. Repeat this movement for 10-15 repetitions on each leg. This exercise can be modified by adding ankle weights as strength improves. Proper form is crucial; avoid arching your back or using momentum to lift your leg. Consistent practice of straight leg raises will contribute to improved knee stability and function post-surgery.

Wall Slides

Wall slides are an excellent low-impact exercise to enhance knee flexibility and quadriceps strength before a knee replacement. Begin by standing with your back flat against a wall, feet shoulder-width apart and slightly forward. Slowly slide down the wall, bending your knees to approximately a 45-degree angle, maintaining contact with the wall throughout the movement.

Hold this position for a few seconds, then slowly slide back up to the starting position. Repeat this exercise for 10-15 repetitions. Ensure your knees track over your ankles and avoid letting them extend past your toes. Wall slides help build endurance and prepare the muscles surrounding the knee for the demands of post-operative rehabilitation.

Heel Slides

Heel slides are a gentle exercise designed to improve knee range of motion and flexibility prior to knee replacement surgery. Lie on your back with your legs extended. Slowly slide the heel of one leg towards your buttocks, bending your knee as far as comfortable without causing pain.

Keep your heel in contact with the surface throughout the movement. Then, slowly slide your heel back to the starting position, straightening your leg. Repeat this exercise 10-15 times on each leg. Heel slides help lubricate the knee joint and prepare it for increased mobility post-surgery, contributing to a smoother recovery process.

Chair Squats

Chair squats are a modified squat exercise that builds strength in the quadriceps, hamstrings, and gluteal muscles – crucial for supporting the knee joint. Position a sturdy chair in front of you. Stand with your feet shoulder-width apart and slowly lower your body as if you’re going to sit in the chair.

Tap your buttocks lightly on the chair seat, then push back up to a standing position, engaging your leg and core muscles. Repeat this movement 10-15 times. This exercise improves lower body strength and prepares you for the demands of post-operative rehabilitation, enhancing functional mobility.

Standing Calf Raises

Standing calf raises effectively strengthen the calf muscles (gastrocnemius and soleus), which play a vital role in knee stability and walking. Find a stable surface for balance, like a countertop or chair back. Stand with your feet flat on the floor, shoulder-width apart.

Slowly rise up onto your toes, lifting your heels off the ground as high as comfortably possible. Hold this position for a second, then slowly lower your heels back down to the floor. Repeat this exercise 10-15 times. Strengthening your calves improves gait and reduces stress on the knee joint, aiding recovery.

Creating a Pre-Knee Replacement Exercise Plan

A tailored plan should include consistent exercise frequency, proper warm-up and cool-down routines, and modifications based on individual fitness levels for optimal preparation.

Frequency and Duration of Exercises

Consistency is key when establishing a pre-knee replacement exercise routine; Aim for at least three to five sessions per week, allowing for rest and recovery between workouts. Each session doesn’t need to be lengthy; 20-30 minutes can be highly effective.

Begin with shorter durations and lower intensity, gradually increasing as your strength and endurance improve. For example, start with 10 repetitions of each exercise and progressively work towards 15-20. Listen to your body and avoid pushing yourself too hard, especially in the initial stages.

Remember, the goal isn’t to exhaust yourself, but to prepare your muscles for the demands of surgery and recovery. A well-structured plan, followed consistently, will yield the best results.

Warm-up and Cool-down Routines

Prioritize preparation with a 5-10 minute warm-up before each exercise session. Gentle cardiovascular activity, like walking in place or stationary cycling, increases blood flow to the muscles. Dynamic stretches, such as leg swings and arm circles, improve range of motion and prepare joints for exercise.

Don’t skip the cool-down! A 5-10 minute cool-down helps gradually lower your heart rate and prevents muscle soreness. Static stretches, holding each stretch for 20-30 seconds, improve flexibility and promote recovery. Focus on stretching the quadriceps, hamstrings, calves, and glutes.

These routines are crucial for injury prevention and maximizing the benefits of your prehab program.

Modifications for Different Fitness Levels

Beginner modifications involve reducing the range of motion or using assistance. For example, perform chair squats instead of full squats, or use a wall for support during wall slides. Start with fewer repetitions and sets, gradually increasing as strength improves.

Intermediate exercisers can increase the repetitions, sets, or resistance (using light weights or resistance bands). Focus on maintaining proper form throughout each exercise. Consider adding more challenging variations, like step-ups or lunges (with caution).

Advanced individuals can incorporate more complex exercises and higher resistance. Prioritize controlled movements and listen to your body. Remember, prehab is about preparation, not pushing limits to the point of pain.

Resources for Finding Pre-Knee Replacement Exercise PDFs

Hospitals and clinics often provide tailored PDFs; Online exercise libraries offer general programs, while a physical therapist can create a personalized plan for optimal results.

Hospital and Clinic Provided Materials

Many hospitals and orthopedic clinics recognize the value of pre-operative preparation and proactively offer patients resources, including specifically designed pre-knee replacement exercise PDFs. These materials are often tailored to the surgical techniques used by their surgeons and the post-operative rehabilitation protocols followed within their facility.

Typically, these PDFs will detail a progressive exercise program, starting with gentle range-of-motion exercises and gradually increasing in intensity to include strengthening activities. They often include clear illustrations or even links to videos demonstrating proper form.

Don’t hesitate to ask your surgeon’s office or the pre-operative education department if such materials are available. Utilizing these resources ensures the exercises align with your specific surgical plan and post-operative care.

Online Exercise Libraries

Numerous websites and online platforms host exercise libraries containing pre-knee replacement exercise PDFs and videos. These resources can supplement materials provided by your healthcare team, offering a wider variety of exercises and instructional formats. However, exercise caution when selecting online resources.

Look for websites affiliated with reputable healthcare organizations, physical therapy associations, or established medical institutions. Ensure the exercises are specifically designed for pre-operative knee replacement preparation, not just general knee strengthening.

Always prioritize resources that emphasize proper form and technique. Before starting any new exercise program, it’s crucial to discuss it with your physical therapist or surgeon to ensure it’s appropriate for your individual needs and fitness level.

Physical Therapist Consultations

A consultation with a physical therapist (PT) is arguably the most valuable resource for a personalized pre-knee replacement exercise plan; A PT can conduct a thorough assessment of your current strength, flexibility, and range of motion, identifying specific areas needing improvement.

They will then design a tailored exercise program, often including a PDF guide with detailed instructions and illustrations, ensuring proper form and technique. This individualized approach minimizes the risk of injury and maximizes the benefits of prehabilitation.

Furthermore, a PT can address any concerns you may have and modify exercises as needed throughout your pre-operative period, providing ongoing support and guidance for optimal preparation.

Safety Considerations

Prioritize listening to your body during exercises, avoiding any movements that cause pain. Proper form is crucial; stop if discomfort arises and consult your PT.

Listening to Your Body

Paying attention to your body’s signals is paramount during pre-knee replacement exercises. Discomfort is different from pain; mild muscle soreness is expected, but sharp, stabbing, or increasing pain indicates a problem. Don’t push through pain, as it could exacerbate existing conditions or create new ones.

Modify exercises as needed to suit your current fitness level and pain tolerance. If an exercise feels too difficult, reduce the repetitions or range of motion. Rest when you need to, and don’t hesitate to communicate any concerns to your physical therapist or healthcare provider; Ignoring your body’s warnings can hinder progress and potentially delay your surgery or recovery.

Remember, prehab is about preparing your body, not punishing it. A gradual and mindful approach is key to success.

Avoiding Pain During Exercise

Prioritizing a pain-free experience is crucial when performing pre-knee replacement exercises. If you experience any sharp, intense, or persistent pain, immediately stop the exercise. Don’t “work through” pain, as this can worsen your condition and potentially impede recovery. Mild discomfort or muscle soreness is normal, but it shouldn’t be debilitating.

Modify exercises to reduce the intensity or range of motion if needed. Consider using assistive devices or seeking guidance from a physical therapist to ensure proper form and technique. Focus on controlled movements and avoid any sudden or jerky motions. Remember, the goal is to strengthen muscles without causing further damage or inflammation.

Consistent communication with your healthcare team is vital for managing pain and adjusting your exercise plan accordingly.