
Ingersoll Rand Air Compressor Troubleshooting Guide PDF: An Overview
Ingersoll Rand excels in metal removal technology, offering cutting tools and solutions for diverse industries; their PDF guides aid in maintaining optimal compressor performance․
Understanding Your Compressor Model
Before diving into troubleshooting, identifying your specific Ingersoll Rand air compressor model is crucial․ Different models possess unique components and operational characteristics․ Locate the model number – typically found on a nameplate affixed to the compressor tank or housing․ This number is essential when accessing the correct PDF manual and parts diagrams․
Ingersoll Rand offers a vast range of compressors, from portable units to large industrial systems․ Knowing whether you have a single-stage, two-stage, oil-lubricated, or oil-free compressor dictates the appropriate troubleshooting steps․ The official PDF manual, tailored to your model, will detail specific maintenance schedules, component locations, and safety precautions․ Accurate model identification ensures effective and safe repairs․
Locating the Official PDF Manual
Accessing the official Ingersoll Rand PDF manual is paramount for effective troubleshooting and maintenance․ Begin your search on the Ingersoll Rand Support Website․ Utilize the search function, entering your compressor’s specific model number․ The website provides a comprehensive library of documentation, including operator manuals, parts lists, and maintenance guides․
Alternatively, a general web search using the model number and “PDF manual” can yield results․ Ingersoll Rand catalogs are available in both PDF and interactive flip-book formats, offering convenient access to information․ Ensure the manual downloaded corresponds precisely to your compressor model to avoid incorrect procedures․ Having the correct PDF ensures safe and accurate repairs․

Common Ingersoll Rand Air Compressor Problems
Frequent issues include low air pressure, compressors failing to start, and overheating; proper diagnosis, aided by manuals, is crucial for effective repair․
Low Air Pressure Issues
Experiencing insufficient air pressure is a common concern with Ingersoll Rand compressors․ This can stem from several sources, demanding a systematic troubleshooting approach․ Firstly, verify adequate tank pressure – a failing pressure switch or slow compressor recovery can be culprits․ Secondly, meticulously inspect all air connections for leaks; even small leaks significantly reduce output․
Consider the air filter; a clogged filter restricts airflow, lowering pressure․ Check the check valve, ensuring it’s sealing correctly to prevent air from flowing back into the compressor․ Finally, confirm the compressor’s motor is functioning optimally, as a weak motor struggles to maintain pressure․ Referencing the official PDF manual is vital for model-specific guidance and diagrams․
Insufficient Tank Pressure
Insufficient tank pressure indicates the compressor isn’t building or holding air effectively․ Begin by checking the pressure switch; a faulty switch may not be calling for the motor to run, or shutting it off prematurely․ Inspect the compressor’s unloader valve – if stuck in the ‘unload’ position, it prevents tank pressurization․
A failing compressor pump, due to worn rings or valves, can also cause this issue․ Verify the motor is receiving adequate power and isn’t overloaded․ Listen for unusual noises during operation, which could signal internal component failure․ Consult the Ingersoll Rand PDF manual for specific pressure settings and diagnostic procedures for your model․
Leaking Air Connections
Air leaks significantly reduce compressor efficiency and pressure output․ Start by visually inspecting all air hoses, fittings, and connections for cracks or looseness․ Apply a soapy water solution to connections; bubbles indicate a leak․ Tighten loose fittings, but avoid over-tightening, which can damage threads․
Check the drain valve – a common leak point – and ensure it’s fully closed․ Inspect the air filter housing and connections for any breaches․ Replace damaged hoses or fittings immediately․ Refer to the Ingersoll Rand troubleshooting PDF for diagrams illustrating connection points and recommended torque specifications to ensure a secure seal․
Compressor Won’t Start
When your Ingersoll Rand compressor fails to start, systematically check potential causes․ First, verify a stable electrical supply – check the breaker, power cord, and outlet․ Confirm the power switch is in the ‘on’ position․ Next, investigate the pressure switch; a malfunctioning switch won’t signal the motor to run․
Consult the official PDF manual for specific pressure switch testing procedures․ Inspect the motor overload protector, which may have tripped due to overheating․ Allow it to cool and reset if necessary․ Referencing the troubleshooting guide’s wiring diagrams can help identify electrical faults․

Electrical Supply Problems
If your Ingersoll Rand compressor isn’t starting, begin with a thorough electrical check․ Ensure the power cord is securely plugged into a functioning outlet and isn’t damaged․ Verify the circuit breaker hasn’t tripped; reset it if necessary․ Test the outlet with another device to confirm it’s providing power․
Inspect the compressor’s wiring for loose connections or frayed wires – consult the PDF manual’s wiring diagrams․ A faulty power switch can also prevent startup; test its continuity․ Low voltage can also be a culprit, especially with larger compressors․ Always disconnect power before inspecting electrical components․
Pressure Switch Malfunctions
A malfunctioning pressure switch is a common reason an Ingersoll Rand compressor won’t start or runs erratically․ The switch regulates air pressure by turning the motor on and off․ Check the switch’s adjustment settings against the specifications in your compressor’s PDF manual․
Use a multimeter to test the switch’s continuity; it should open and close at the correct pressure points․ A dirty or corroded switch can also cause issues; try cleaning the contacts carefully․ If the switch is damaged or fails the continuity test, it needs replacement․ Always disconnect power before working on the pressure switch․

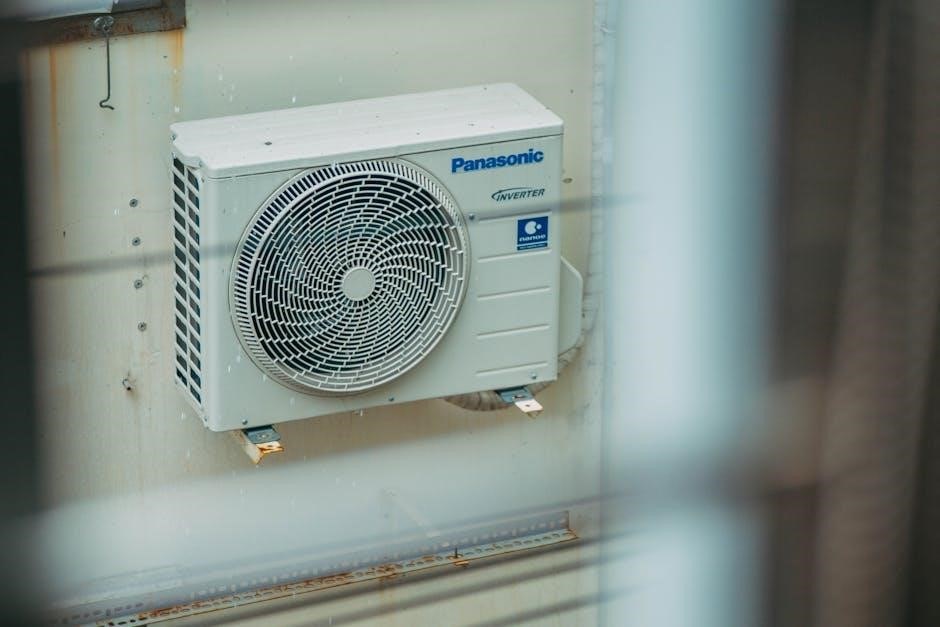
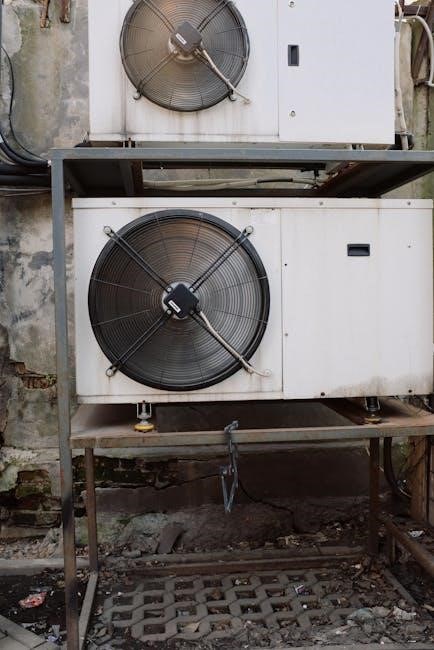
Overheating Problems
Consistent overheating can severely damage your Ingersoll Rand air compressor․ Insufficient ventilation is a primary cause; ensure the compressor has ample space around it for airflow, free from obstructions․ Check the cooling fan to confirm it’s operating correctly and isn’t blocked by debris․
Low oil levels also contribute to overheating due to increased friction․ Regularly check the oil level using the dipstick and top up as needed, following the guidelines in your compressor’s PDF manual․ Inspect the oil for contamination; dirty oil reduces its cooling properties․ Allow the compressor to cool completely before checking oil levels․
Inadequate Ventilation
Proper ventilation is crucial for dissipating heat generated during compressor operation․ Restricting airflow causes heat to build up, leading to overheating and potential damage․ Ensure the compressor isn’t enclosed in a small, confined space․ Maintain a minimum clearance of 18 inches around all sides of the unit for optimal airflow․
Dust and debris accumulation can further impede ventilation․ Regularly clean the compressor’s exterior, paying close attention to the cooling fins․ Avoid placing the compressor near heat sources or in direct sunlight․ Confirm the fan is unobstructed and functioning correctly, as it’s vital for drawing air across the cooling system․
Oil Level Issues
Maintaining the correct oil level is paramount for Ingersoll Rand compressor longevity․ Low oil levels lead to increased friction, causing premature wear and potential seizure of internal components․ Conversely, overfilling can create excessive pressure and foaming, reducing lubrication effectiveness․

Regularly check the oil level using the dipstick, ensuring it falls within the designated range․ Use only the oil type recommended by Ingersoll Rand, as specified in your compressor’s manual․ Inspect for oil leaks around seals and connections, addressing any issues promptly․ Consistent oil changes, as per the maintenance schedule, are vital for optimal performance and preventing overheating․
Troubleshooting Specific Components
Detailed PDF guides from Ingersoll Rand pinpoint issues within key components like pressure switches, check valves, and motors for efficient repair․
Pressure Switch Troubleshooting
The pressure switch is crucial for regulating compressor operation, and troubleshooting it often involves checking for electrical continuity with a multimeter, as detailed in Ingersoll Rand’s PDF manuals․ A faulty switch can prevent the compressor from starting or cause it to run continuously․ Inspect the switch’s diaphragm for tears or damage, and verify that the air passages are clear of obstructions․
Adjusting the pressure switch requires careful attention to the desired cut-in and cut-out pressures, referencing the specific model’s instructions within the PDF․ Incorrect settings can lead to insufficient tank pressure or excessive wear․ Always disconnect power before working on the switch, and consult the diagrams provided in the official documentation for proper wiring configurations․ Proper diagnosis, guided by the PDF, ensures safe and effective repair․
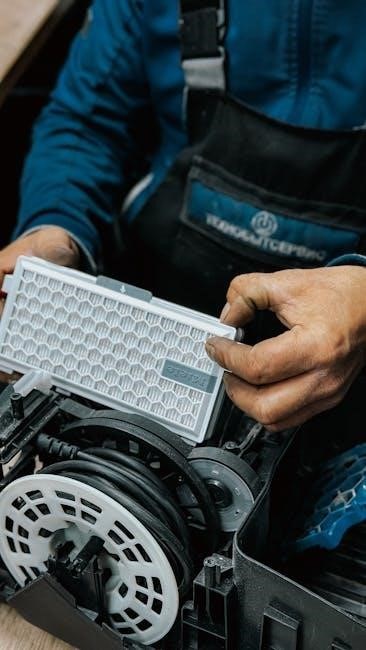
Air Filter Maintenance & Issues
Ingersoll Rand’s PDF guides emphasize regular air filter maintenance as vital for compressor longevity and performance․ A clogged filter restricts airflow, reducing efficiency and potentially causing overheating․ Inspect the filter frequently – daily in dusty environments – for dirt and debris․ Cleaning procedures vary by filter type; some are washable, while others require replacement, as detailed in the manuals․

Common issues include a damaged filter housing or improper sealing, leading to unfiltered air entering the system․ This can contaminate the oil and damage internal components․ The PDF diagrams illustrate correct filter installation and sealing techniques․ Ignoring air filter maintenance can lead to costly repairs, so adhering to the recommended schedule outlined in the documentation is crucial for optimal operation․
Check Valve Problems & Solutions
Ingersoll Rand compressor PDF manuals detail the importance of a functioning check valve, preventing backflow from the tank to the pump when the compressor is off․ Common issues include a stuck or dirty valve, leading to pressure loss and the compressor repeatedly cycling․ Troubleshooting involves inspecting the valve for debris or corrosion, often requiring disassembly as shown in the diagrams․
Solutions range from cleaning the valve with solvent to complete replacement․ A faulty check valve can strain the motor and reduce overall system efficiency․ The guides emphasize using genuine Ingersoll Rand replacement parts to ensure compatibility and performance․ Regular inspection, as part of preventative maintenance, can identify potential problems before they escalate into major repairs, saving time and expense․
Motor Troubleshooting
Ingersoll Rand compressor PDF guides dedicate significant sections to motor diagnostics․ Common motor issues include capacitor failure, causing the motor to hum but not start, and overload protection tripping due to overheating or excessive current draw․ The manuals provide detailed steps for testing the capacitor with a multimeter and resetting the overload switch․
Troubleshooting also covers checking for winding shorts or open circuits, requiring more advanced electrical testing․ The guides stress safety precautions when working with electrical components․ Replacement parts should always be genuine Ingersoll Rand to maintain warranty and performance․ Proper ventilation, as detailed in the maintenance sections, is crucial to prevent motor overheating and ensure longevity, extending the compressor’s operational life․
Capacitor Failure
Ingersoll Rand compressor troubleshooting PDFs frequently identify capacitor failure as a primary motor starting issue․ A failing capacitor often manifests as a humming sound from the motor without rotation․ The guides detail how to safely discharge the capacitor before testing with a multimeter to verify capacitance – a reading significantly outside the specified range indicates failure․
Replacement requires matching the original capacitor’s voltage and microfarad (µF) rating precisely․ Incorrect capacitance can damage the motor․ The manuals emphasize disconnecting power before any capacitor work and highlight the potential for a dangerous electrical shock․ Proper capacitor function is vital for providing the necessary starting torque to the motor, ensuring reliable compressor operation․
Motor Overload Protection
Ingersoll Rand compressor troubleshooting PDFs consistently address motor overload protection as a critical safety feature․ These guides explain that overload protectors, typically thermal or magnetic, interrupt power to prevent motor damage from overheating due to excessive current draw․ Repeated tripping suggests underlying issues like a failing capacitor, restricted airflow, or a jammed pump․
The manuals detail how to reset the overload protector after addressing the root cause․ Ignoring the underlying problem and repeatedly resetting the protector can lead to motor burnout․ Troubleshooting steps involve checking for obstructions, verifying proper voltage, and inspecting the motor windings for shorts․ Understanding this protection system is key to preventing costly repairs and ensuring compressor longevity․
Maintenance & Preventative Measures
Regular oil changes, air filter upkeep, and daily tank draining—as detailed in Ingersoll Rand’s PDFs—prolong compressor life and maintain peak efficiency․
Regular Oil Changes
Maintaining proper oil levels and scheduling regular oil changes are crucial for Ingersoll Rand air compressor longevity․ Refer to your specific model’s PDF manual for recommended oil types and change intervals․ Oil lubricates vital components, reducing friction and wear, preventing overheating, and ensuring efficient operation․ Neglecting oil changes leads to increased friction, potential component failure, and reduced compressor performance․
Contaminated or degraded oil loses its lubricating properties, accelerating wear on pistons, cylinders, and bearings․ The PDF guides often detail specific procedures for oil draining and refilling, emphasizing the importance of using the correct oil viscosity and capacity․ Consistent oil maintenance, as outlined in the documentation, is a cornerstone of preventative maintenance․
Air Filter Cleaning/Replacement
Ingersoll Rand air compressor performance heavily relies on a clean air intake․ The PDF troubleshooting guides emphasize regular air filter maintenance – either cleaning or replacement – to prevent contaminants from entering the compressor․ Dirty filters restrict airflow, causing the motor to work harder, reducing efficiency, and potentially leading to overheating․
The frequency of cleaning or replacement depends on the operating environment; dusty conditions require more frequent attention․ The manuals detail the filter location and recommended cleaning procedures (if applicable) or specify the correct replacement filter part number․ Ignoring air filter maintenance can significantly shorten the compressor’s lifespan and void warranty coverage, as outlined in the documentation․
Drain Tank Moisture Daily
Ingersoll Rand compressor PDF manuals consistently highlight the critical importance of daily tank draining․ As air is compressed, moisture accumulates within the tank․ If left unchecked, this moisture can lead to corrosion, reducing tank capacity and potentially causing internal damage․ Furthermore, water in the air line can negatively impact tools and applications relying on clean, dry air․
The guides illustrate the location of the drain valve and provide clear instructions for proper operation․ Regularly draining the tank ensures optimal compressor performance, extends its lifespan, and prevents costly repairs․ Neglecting this simple maintenance task can compromise air quality and lead to significant operational issues, as detailed within the troubleshooting resources․

Resources & Further Help
Ingersoll Rand’s support website offers extensive resources, including parts diagrams in PDF format, and a dedicated Customer Support Team for assistance․
Ingersoll Rand Support Website
Ingersoll Rand’s official website is a crucial resource for air compressor owners seeking troubleshooting assistance and detailed information․ The site provides access to a comprehensive library of documentation, including downloadable PDF manuals specific to various compressor models․ Users can navigate through product catalogs, viewing both PDF and interactive flip-book versions for easy browsing of tooling solutions․
Furthermore, the website facilitates direct contact with their Customer Support Team, enabling users to address questions regarding order processing, delivery timelines, or pricing inquiries․ This direct line of communication ensures prompt assistance and personalized support, streamlining the troubleshooting process and maximizing compressor uptime․ The website is designed to be a central hub for all Ingersoll Rand product-related needs․
Finding Parts Diagrams (PDF)
Ingersoll Rand understands the importance of readily available parts information for effective compressor maintenance and repair․ Their website hosts an extensive collection of parts diagrams in PDF format, categorized by compressor model․ These diagrams are invaluable for identifying specific components, understanding assembly configurations, and ensuring accurate parts ordering․
Accessing these diagrams simplifies the troubleshooting process, allowing technicians and owners to visualize the internal workings of their compressors․ The detailed illustrations aid in pinpointing faulty parts and facilitate efficient repairs, minimizing downtime․ Combined with the comprehensive product catalogs available in both PDF and flip-book formats, locating the correct replacement parts becomes significantly easier, supporting long-term compressor reliability․