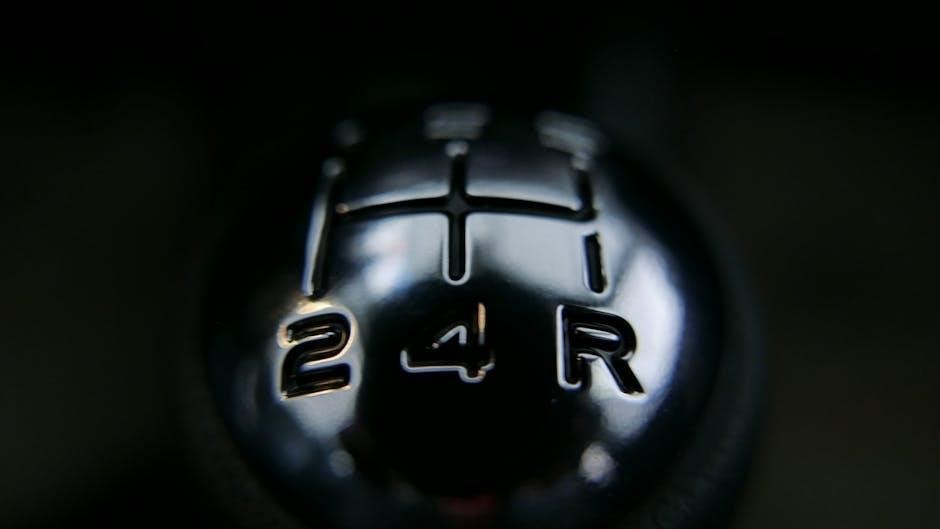
The manual transmission Toyota RAV4 is a sought-after option for driving enthusiasts, offering a 5-speed manual gearbox in earlier models. Known for its unique driving experience, it combines practicality with a rare manual option in the SUV segment.
Overview of Manual Transmission in Toyota RAV4
The manual transmission Toyota RAV4 offers a unique driving experience, blending practicality with enthusiast appeal. Equipped with a 5-speed manual gearbox, it provides precise control and a sporty feel. Historically, manual RAV4s were popular for their fuel efficiency and driving engagement. However, recent models have shifted toward automatic and hybrid options, limiting manual availability. Enthusiasts appreciate the tactile connection of shifting gears, making it a standout choice in the SUV segment. Maintenance tips, such as regular fluid changes, are crucial for longevity. While manual transmissions are less common in newer RAV4s, they remain a desirable option for those who value a hands-on driving experience.
Historical Background of Manual Transmission in RAV4 Models
The manual transmission Toyota RAV4 first debuted in 1994 as a compact SUV with a 5-speed manual gearbox, offering a unique blend of practicality and driver engagement. Early models were praised for their fuel efficiency and sporty feel, making the manual variant a favorite among enthusiasts. Over the years, the manual option remained available, though its popularity waned with the rise of automatic transmissions. By the mid-2000s, the manual RAV4 became less common, and by the 2010s, it was largely phased out in many markets. Despite its decline, the manual RAV4 retains a loyal following, with many owners appreciating its tactile driving experience and mechanical simplicity.
Unique Features of Manual Transmission Toyota RAV4
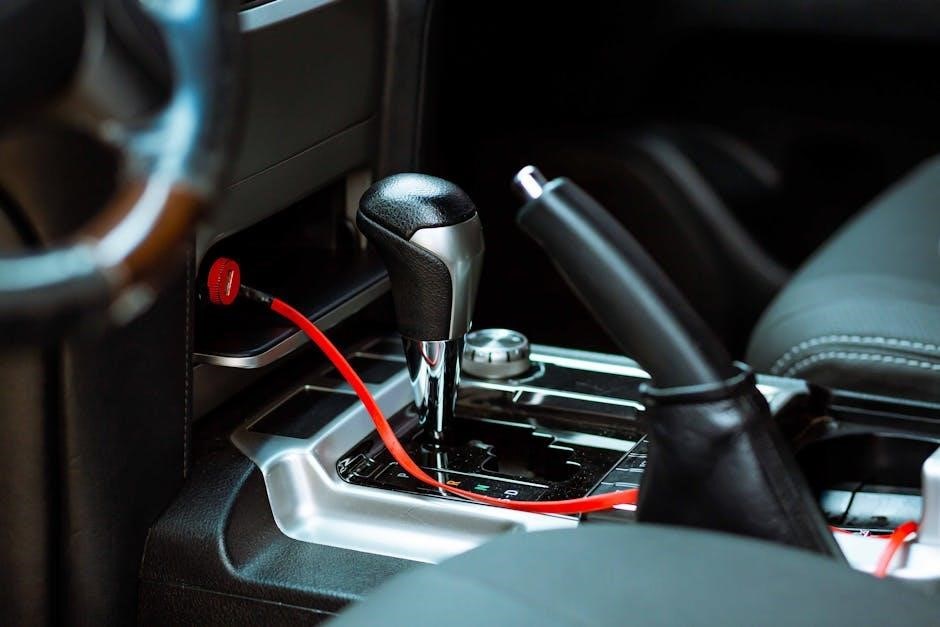
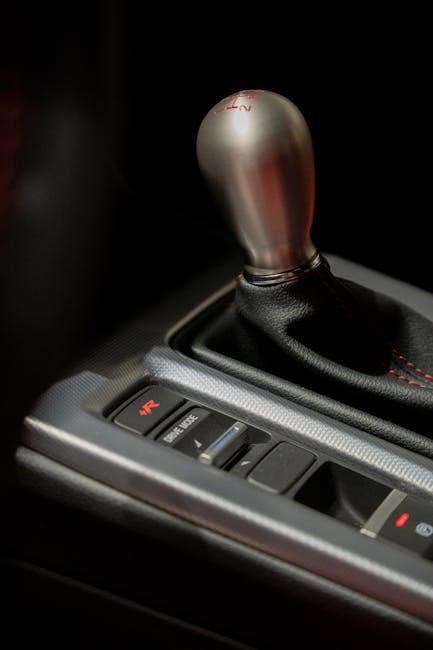
The manual transmission Toyota RAV4 stands out for its lightweight design and precise gear shifts, offering a more connected driving experience. It features a compact gearbox optimized for fuel efficiency and responsiveness. Unlike automatic models, the manual RAV4 provides direct control over acceleration and deceleration, enhancing driver engagement. Its mechanical simplicity reduces reliance on complex electronics, making it more reliable and cost-effective to maintain. Additionally, the manual variant often comes with a lower starting price compared to automatic models, appealing to budget-conscious buyers. These characteristics make the manual RAV4 a preferred choice for enthusiasts who value driving dynamics and affordability in an SUV.
History and Evolution of Manual Transmission in Toyota RAV4
The manual transmission in Toyota RAV4 has evolved significantly, starting with its introduction in the first generation. Over the years, it has been refined for better performance and efficiency, adapting to changing market demands and technological advancements.
First Generation (1994–2000): The Beginning of Manual RAV4
The first generation of the Toyota RAV4, introduced in 1994, marked the beginning of the manual transmission in this compact SUV. This 5-speed manual transmission was praised for its smooth shifting and fuel efficiency, making the RAV4 a popular choice for urban drivers. The manual option provided drivers with better control and engagement, appealing to both first-time buyers and enthusiasts. Its compact design and lightweight construction contributed to the vehicle’s agility and economy. This initial offering laid the groundwork for future generations, showcasing Toyota’s commitment to integrating manual transmissions in their SUV lineup. The success of this generation influenced the evolution of manual transmissions in subsequent RAV4 models, setting a standard for years to come.
Second Generation (2000–2005): Refinement and Improvements
The second-generation Toyota RAV4 (2000–2005) saw significant refinements to its manual transmission system. The 5-speed manual gearbox became smoother and more precise, offering better driver feedback. Engineers focused on reducing gear noise and improving overall shifting quality. This generation also introduced a more robust clutch system, enhancing durability and performance. The manual transmission was paired with a range of engine options, including the 1.8L and 2.0L powertrains, delivering improved fuel efficiency. Toyota also expanded the availability of the manual option to higher trim levels, catering to driving enthusiasts. These advancements solidified the RAV4’s reputation as a reliable and engaging compact SUV, appealing to both practical and performance-oriented buyers.
Third Generation (2005–2012): Shift in Popularity
The third-generation Toyota RAV4 (2005–2012) marked a turning point in the popularity of its manual transmission. While the 5-speed manual remained available, it faced increasing competition from automatic transmissions. Toyota introduced a more refined manual gearbox with improved gear ratios, enhancing both performance and fuel efficiency; The manual option was particularly popular in Europe, where driving enthusiasts appreciated its responsiveness. However, in North America, the automatic transmission gained favor due to its convenience. This generation saw a decline in manual transmission sales, signaling a broader market shift toward automatics. Despite this, the manual RAV4 retained its reputation for driving engagement, catering to a niche audience. Toyota continued to offer the manual as a trim-level option, though its availability became more limited compared to earlier generations.
Fourth Generation (2012–2019): Decline of Manual Option
The fourth-generation Toyota RAV4 (2012–2019) saw a significant decline in the availability and popularity of the manual transmission. Toyota discontinued the manual option in many markets, including North America, where the automatic transmission became the sole offering. In Europe and Asia, the manual remained available but only in lower trim levels. This shift reflected the global trend toward automatic and CVT transmissions, driven by urbanization and the desire for convenience. Despite this, the manual RAV4 maintained a loyal following among driving purists, who valued its precision and control. Toyota’s focus on hybrid and automatic models during this period further accelerated the manual’s decline, making it a niche choice.
Fifth Generation (2019–Present): Limited Availability
The fifth-generation Toyota RAV4 (2019–present) continues the trend of reducing manual transmission availability. In most global markets, the manual option is either absent or restricted to specific trim levels and regions. For instance, in Europe, the manual is primarily offered in base models, while in North America, it has been phased out entirely. Toyota’s focus on hybrid and automatic variants dominates the lineup, reflecting consumer preferences for convenience and advanced technology. However, in some Asian markets, the manual remains an option, catering to budget-conscious buyers and driving enthusiasts. This limited availability underscores Toyota’s strategic shift toward modernizing the RAV4 lineup, prioritizing efficiency and automation over manual driving experiences.

Maintenance and Care for Manual Transmission Toyota RAV4
Regular maintenance ensures optimal performance and longevity of the manual transmission. Check fluid levels, inspect the clutch system, and schedule professional servicing to prevent wear and tear.
Importance of Regular Transmission Fluid Changes

Regular transmission fluid changes are vital for maintaining the health and performance of the manual Toyota RAV4. The fluid lubricates gears, reduces friction, and prevents overheating. Over time, it degrades, losing its ability to protect moving parts, which can lead to premature wear and costly repairs. Toyota recommends changing the transmission fluid every 30,000 to 60,000 miles, depending on driving conditions. Using the correct type of fluid ensures optimal performance and prevents damage; Neglecting this maintenance can result in gear slippage, rough shifting, and eventual transmission failure. Regular fluid changes help extend the lifespan of the manual transmission and maintain smooth, reliable operation.
Common Issues with Manual Transmission in RAV4
The manual transmission in Toyota RAV4 models can experience specific issues, often related to wear and tear. One common problem is clutch wear, which can lead to slipping or hesitation between gears. Another issue is gear grinding, often caused by improper shifting or synchronization problems. Additionally, some owners have reported difficulty engaging reverse gear due to misalignment or worn components. Over time, the transmission may develop leaks, leading to fluid loss and reduced performance. These issues are more prevalent in higher-mileage vehicles or those driven in stop-and-go traffic. Addressing these problems early can prevent costly repairs and ensure smooth operation of the manual transmission system.
Cost of Repairing Manual Transmission in RAV4
The cost of repairing a manual transmission in a Toyota RAV4 varies depending on the extent of the damage and the components needing replacement. Clutch replacements, one of the most common repairs, can range from $500 to $1,500, including labor. If the transmission requires a rebuild, costs can escalate to $1,500–$3,000, depending on the model year and complexity. In severe cases, such as a failed gearbox, a full replacement may be necessary, which can cost between $2,000 and $4,000. Prices may also vary based on whether OEM or aftermarket parts are used. It’s essential to consult a trusted mechanic for an accurate estimate tailored to the specific issue.
Transmission Rebuild vs. Replacement: Pros and Cons
A transmission rebuild involves repairing or replacing damaged components while keeping the existing unit intact, often costing less than a full replacement. This option is ideal for minor issues and allows for customization with upgraded parts. However, it can be labor-intensive and may not guarantee long-term durability if the transmission is heavily worn. On the other hand, replacing the transmission with a new or used unit offers greater reliability and a factory or dealer warranty. However, it is typically more expensive upfront. The decision depends on the severity of the damage, budget, and desired longevity of the repair. Weighing these factors is crucial for making an informed choice.
DIY Maintenance Tips for Manual RAV4 Owners
Regular DIY maintenance can extend the life of your manual transmission Toyota RAV4; Start by inspecting the clutch pedal and cable for wear or damage. Check the transmission fluid level using the dipstick, ensuring it’s clean and at the recommended level. Replace the air filter every 15,000 to 30,000 miles to maintain optimal performance. Lubricate the shift linkage and clutch pedal hinge periodically for smooth operation; Additionally, monitor the gear engagement for smooth shifting and adjust the clutch pedal free play as needed. Always refer to your owner’s manual for specific instructions and intervals. These simple steps can prevent major issues and keep your manual RAV4 running smoothly.
Driving Experience with Manual Transmission Toyota RAV4
The manual transmission Toyota RAV4 offers a more engaging and responsive driving experience, providing better control and precision. It enhances driver satisfaction, especially for enthusiasts.
Performance Comparison: Manual vs. Automatic RAV4
The manual transmission Toyota RAV4 delivers a sportier driving experience with quicker acceleration and better control, especially on winding roads. It typically achieves slightly better fuel efficiency, particularly in highway driving. Automatic models, however, prioritize smoothness and convenience, making them more suitable for urban and stop-and-go traffic. The manual version is lighter, enhancing power-to-weight ratio and responsiveness. Automatics often come with features like paddle shifters, offering a pseudo-manual feel but lacking the direct engagement of a true manual. For enthusiasts, the manual provides a more connected driving experience, while the automatic caters to comfort and ease. Both options meet different driver preferences effectively.
Handling and Control with Manual Transmission
The manual transmission Toyota RAV4 offers enhanced handling and control, particularly for drivers who enjoy precise gear shifts and direct vehicle responsiveness. The manual gearbox allows drivers to better connect with the car, especially on winding roads or uneven terrain. With manual control, the RAV4’s weight distribution and suspension characteristics shine, providing a more engaging and predictable driving experience. In city driving, the manual transmission can improve maneuverability and parking ease due to its direct throttle and gear engagement. However, it requires more driver input and clutch coordination compared to automatic models. This added control makes the manual RAV4 a favorite among enthusiasts seeking a more active role in driving dynamics.
Fuel Efficiency: Manual vs. Automatic RAV4
The manual transmission Toyota RAV4 historically offered slightly better fuel efficiency compared to its automatic counterpart, particularly in city driving conditions. This is due to the manual gearbox being lighter and having less parasitic loss. However, with advancements in automatic transmissions, such as the use of continuously variable transmissions (CVTs) in newer RAV4 models, the fuel economy gap has narrowed significantly. While manual transmissions provide drivers with more control over gear shifts, the efficiency advantage is now minimal. For instance, older manual RAV4 models might achieve up to 1-2 mpg better in city driving, but modern automatics often match or even surpass these figures depending on driving habits and road conditions.
Driver Engagement and Satisfaction
Driving a manual transmission Toyota RAV4 offers a unique sense of connection and control that automatic versions often lack. The ability to shift gears and manage the clutch allows drivers to feel more engaged with the vehicle, creating a more immersive driving experience. Many enthusiasts report higher satisfaction levels due to the hands-on nature of manual driving, which fosters a deeper bond between the driver and the car. The tactile feedback from the gearshift and the thrill of perfectly timing shifts contribute to a more enjoyable journey. For those who appreciate the art of driving, the manual RAV4 delivers a rewarding experience that goes beyond mere transportation.
Challenges of Driving a Manual RAV4 in Urban Areas
Driving a manual transmission Toyota RAV4 in urban areas presents several challenges. Heavy traffic, frequent stop-and-go situations, and tight parking spaces require constant gear shifting and clutch operation, which can be tiring and inconvenient. In congested city driving, the need to manually shift gears between low speeds can become repetitive and frustrating. Additionally, parking in compact urban spaces demands precise control over the clutch and throttle, which may be less forgiving for inexperienced drivers. Hills in urban environments also pose challenges, as maintaining control while navigating inclines can be difficult. These factors make city driving less enjoyable for some compared to the smoother experience of an automatic transmission.

Manual Transmission Toyota RAV4 in Different Markets
The manual transmission Toyota RAV4 varies in availability across global markets, with limited options in North America and greater presence in Europe and Asia, reflecting regional driving preferences and demand for cost-effective, driver-engaged SUVs.
Availability in North America
In North America, the manual transmission Toyota RAV4 has seen fluctuating availability. It was initially offered in base models during the first and second generations (1994–2005), appealing to budget-conscious buyers. However, as the market shifted toward automatic transmissions, manual options became less common. By the third generation (2005–2012), manuals were limited to specific trims. The fourth generation (2012–2019) largely phased out manual transmissions in the U.S., though Canada retained it in some models. Today, manual RAV4s are rare in North America, with the fifth generation (2019–present) offering it only in select regions or trims, reflecting declining demand for manual SUVs in the U.S. market.
Manual RAV4 in Europe and Asia
In Europe and Asia, the manual transmission Toyota RAV4 has maintained a stronger presence compared to North America. European markets, particularly the UK, France, and Germany, have consistently offered manual variants across most generations, catering to drivers who prefer precise control and lower costs. In Asia, countries like Japan and Thailand have also seen steady availability, with manual transmissions often being the default choice in base models. However, the popularity of manual RAV4s has declined in recent years, even in these regions, as automatic and CVT options gain favor. Despite this, manual versions remain popular among enthusiasts and those seeking better fuel efficiency in urban and rural driving conditions.
Special Editions and Trim Levels with Manual Transmission
Over the years, Toyota has released several special editions and trim levels of the RAV4 that feature manual transmissions. In earlier generations, the base model and mid-level trims often came with manual options, appealing to budget-conscious drivers. However, as the RAV4 moved upmarket, manual transmissions became less common, reserved for sportier or more affordable trims. In some regions, limited-edition models, such as the “SE” or “XLE,” offered manual transmissions to cater to enthusiasts. These editions often paired the manual gearbox with unique styling elements or performance enhancements. Despite declining availability, certain trims continue to offer manual transmissions, preserving the driving experience for purists.
Toyota’s Global Strategy for Manual Transmissions
Toyota’s global strategy for manual transmissions in the RAV4 reflects regional market preferences and shifting consumer demands. In Europe and Japan, where manual transmissions are more popular, Toyota continues to offer the RAV4 with manual options, catering to driving enthusiasts and cost-conscious buyers. However, in North America, where automatic and CVT transmissions dominate, manual RAV4 models have been phased out. Toyota’s strategy also aligns with its broader focus on hybrid and automatic technologies, prioritizing efficiency and convenience. Despite this, the company maintains a niche for manual transmissions in select markets, ensuring a balance between tradition and innovation in its lineup.

Future of Manual Transmission in Toyota RAV4
The manual transmission in Toyota RAV4 may face decline due to shifting market preferences and rising demand for automatics. Toyota is exploring hybrid manual options.
Toyota’s Plan for Manual Transmissions in Electric Cars
Toyota is exploring innovative ways to integrate manual transmissions into electric vehicles, including the RAV4. By combining electric motors with manual shifting, Toyota aims to enhance driver engagement and performance. This approach could appeal to enthusiasts who value control and the tactile experience of shifting gears. The system might utilize dual motors and advanced torque vectoring to simulate a manual-like driving feel. However, this technology is still in development, and its implementation in the RAV4 remains uncertain. Toyota’s goal is to balance tradition with innovation, offering a unique option in the EV market while maintaining the RAV4’s practicality and efficiency.
Simulated Manual Transmission in Hybrid and Electric RAV4
Toyota is developing simulated manual transmission systems for hybrid and electric RAV4 models, aiming to retain the driving engagement of manual shifting. This technology uses electronic controls to mimic gear changes, often through paddle shifters or a simulated clutch pedal. In hybrid models, the system synchronizes gear shifts with the combustion engine and electric motor for a smoother experience. For electric RAV4s, the simulation focuses on replicating the tactile feedback of shifting, enhancing driver involvement. While not a traditional manual, this innovation bridges the gap between old-school driving and modern electrification, appealing to enthusiasts who crave interaction without sacrificing efficiency.
Market Demand for Manual Transmissions in SUVs
The demand for manual transmissions in SUVs, including the Toyota RAV4, has declined significantly in recent years. Modern drivers often prioritize convenience and ease of use, favoring automatic and CVT options. However, a niche market remains for manual transmissions, particularly among driving enthusiasts who value control and engagement. In regions like Europe and Asia, where fuel efficiency and cost are key factors, manual transmissions are more popular. Yet, in North America, automatics dominate due to traffic-heavy urban environments. Despite this, Toyota continues to offer manual options in select trims, catering to a dedicated audience. This limited demand ensures manuals remain available, albeit in smaller numbers.
Technological Advancements in Manual Transmissions
Recent advancements in manual transmissions for the Toyota RAV4 focus on enhancing performance and efficiency. Modern manual gearboxes feature improved synchronizers and bearings, reducing wear and tear. Lightweight materials, such as aluminum, are now used to decrease weight and improve fuel economy. Additionally, some models incorporate rev-matching technology, smoothing downshifts and reducing driver effort. These innovations aim to maintain the engaging driving experience of manual transmissions while addressing contemporary demands for refinement and efficiency. Despite declining popularity, these advancements ensure manual transmissions remain viable for enthusiasts seeking precise control and connection to the vehicle.
Enthusiast Community and Modifications
The manual Toyota RAV4 has a dedicated enthusiast community, with owners modifying their vehicles for enhanced performance and aesthetics, including aftermarket parts and tuning.
Popular Modifications for Manual RAV4
Enthusiasts often modify their manual RAV4s to boost performance and style. Common upgrades include lightweight alloy wheels, suspension tweaks for better handling, and engine tuning for increased power. Some owners install aftermarket exhaust systems to enhance sound and reduce backpressure. Lightweight body panels and aerodynamic kits are popular for a sportier look. Inside, upgrades like sport seats and steering wheels improve driving comfort. Transmission modifications, such as shorter shifters or performance clutches, are also favored for smoother, more precise shifting. These modifications not only personalize the vehicle but also enhance its driving dynamics, making it a standout choice for those who enjoy driving engagement and unique styling.
Aftermarket Parts for Manual Transmission RAV4
The manual transmission Toyota RAV4 has a variety of aftermarket parts available to enhance performance and driving experience. Clutch kits, such as performance-oriented units with heavier springs, are popular for improved engagement. Short-throw shifters reduce shift travel, making gear changes quicker and more precise. Lightweight flywheels are also installed to improve acceleration and reduce rotational mass. Additionally, aftermarket transmission mounts are used to minimize vibration and provide a more direct feel. Limited-slip differentials and upgraded gear sets are sought after by enthusiasts for better traction and durability. These parts cater to drivers seeking to optimize their manual RAV4 for sportier driving or off-road adventures, ensuring compatibility and reliability.
Community Forums and Resources for Manual RAV4 Owners
Manual transmission Toyota RAV4 owners benefit from active community forums and resources. Platforms like Reddit’s r/RAV4 and specialized automotive forums provide spaces for sharing experiences, troubleshooting, and modifications. Facebook groups dedicated to manual RAV4 enthusiasts also offer valuable insights and support. Additionally, Toyota-specific forums and websites host detailed discussions on maintenance, performance upgrades, and DIY projects. Owners can access repair manuals, how-to guides, and video tutorials on YouTube channels focused on manual transmissions. These communities foster collaboration, helping owners optimize their vehicles and address common issues. They also serve as hubs for connecting with local meetups and events, creating a sense of camaraderie among manual RAV4 drivers worldwide.
Projects and Custom Builds Featuring Manual RAV4
Manual transmission Toyota RAV4s have inspired a variety of custom projects and builds, showcasing their versatility. Enthusiasts often modify these vehicles for off-road adventures, performance enhancement, or unique styling. Some owners opt for suspension lifts, lightweight rims, and high-performance tires to improve handling and aesthetics. Others focus on engine upgrades, such as turbochargers or engine swaps, to boost power output. These projects highlight the RAV4’s potential beyond its stock configuration, appealing to those who seek a personalized driving experience.
Online platforms like Instagram and YouTube feature builders sharing their manual RAV4 transformations, from rally-inspired setups to minimalist, functional designs. These projects not only demonstrate creativity but also inspire others to explore the possibilities of their manual RAV4s, proving that even an SUV can be tailored for enthusiasts.